Do you have any questions?
Are you looking for information about design, ordering or materials?
Enter a phrase below or select a category that interests you.

Do you want to talk to our staff? Contact us
How do I check the size of pattern elements in Photoshop?
Watch the video:
Or see how to do it step by step:
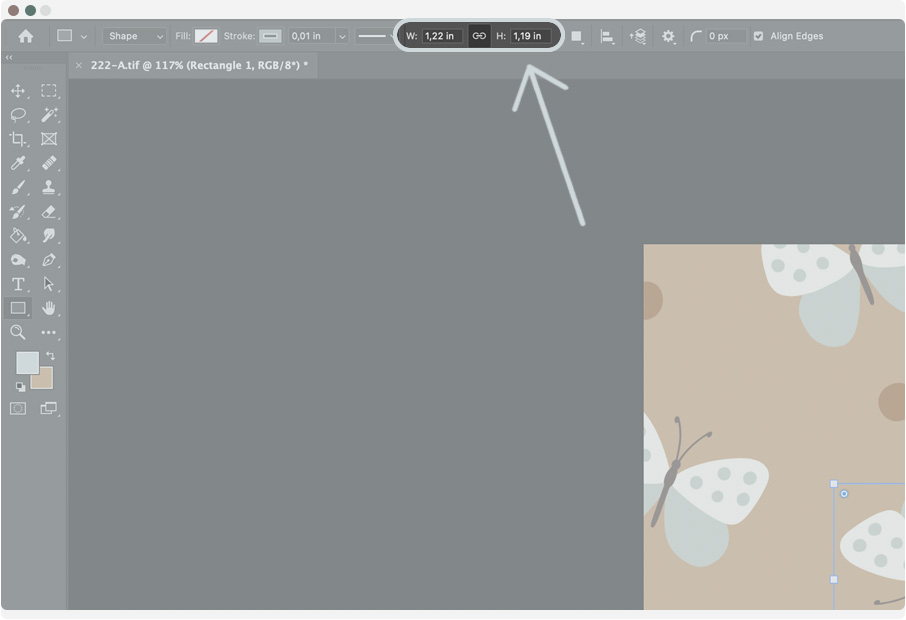
Start by opening the project in Adobe Photoshop.
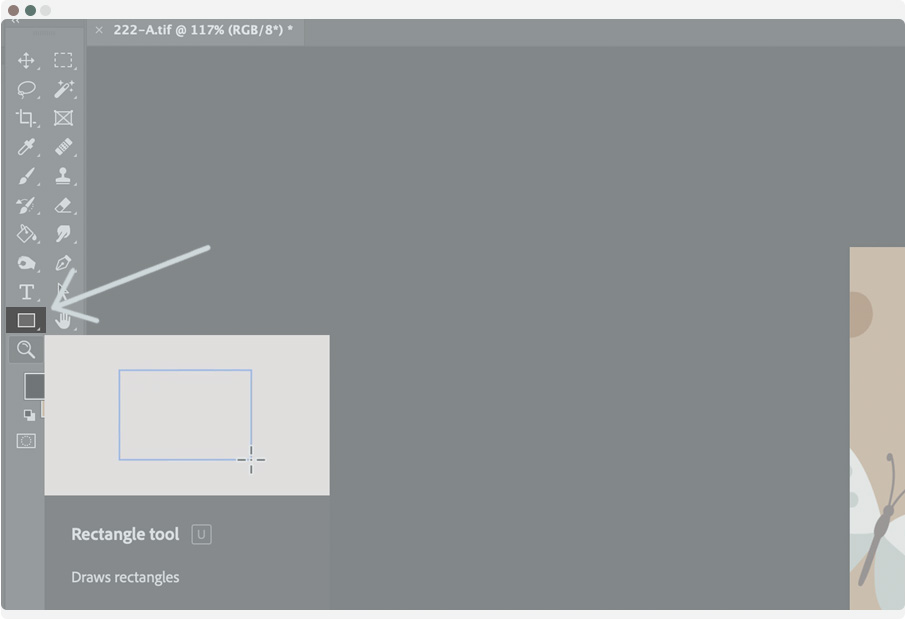
Select the "Rectangular Marquee Tool" from the toolbar on the left.
It is also located under the 'U' shortcut on the keyboard.
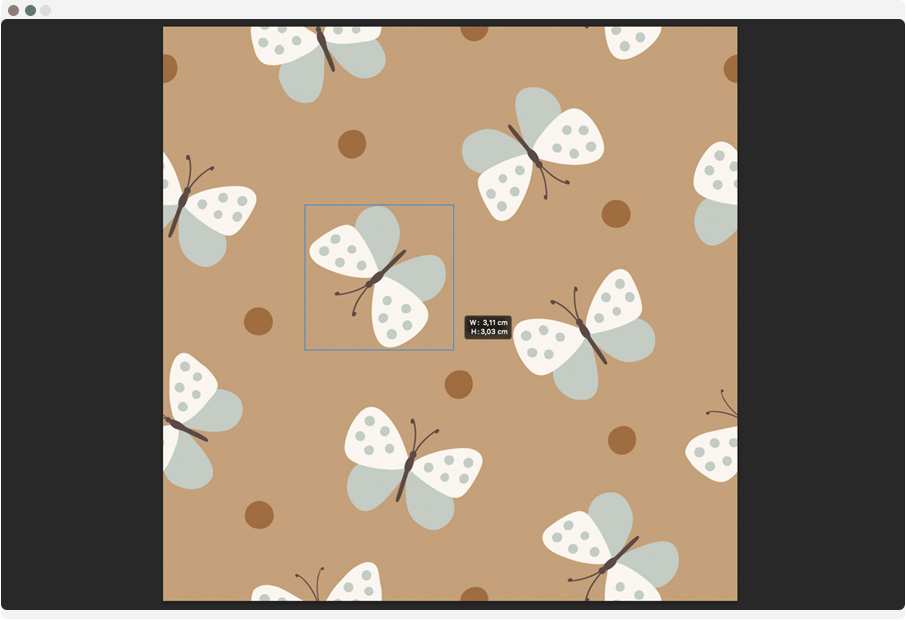
Now all you have to do is select the item you want
To do this click and hold, drag the mouse to form a rectangle.
Shape display options can vary
If your rectangle is filled with colour or you can't see it at all, go to the tools at the top.
Fill - Fill. This option is used to select the fill colour of the shape. If you want the centre of the rectangle to be empty, select no fill - a white rectangle crossed out with a red line.
Stroke - Outline. Here you choose the colour of your outline, it is advisable to choose one with high contrast, such as black.
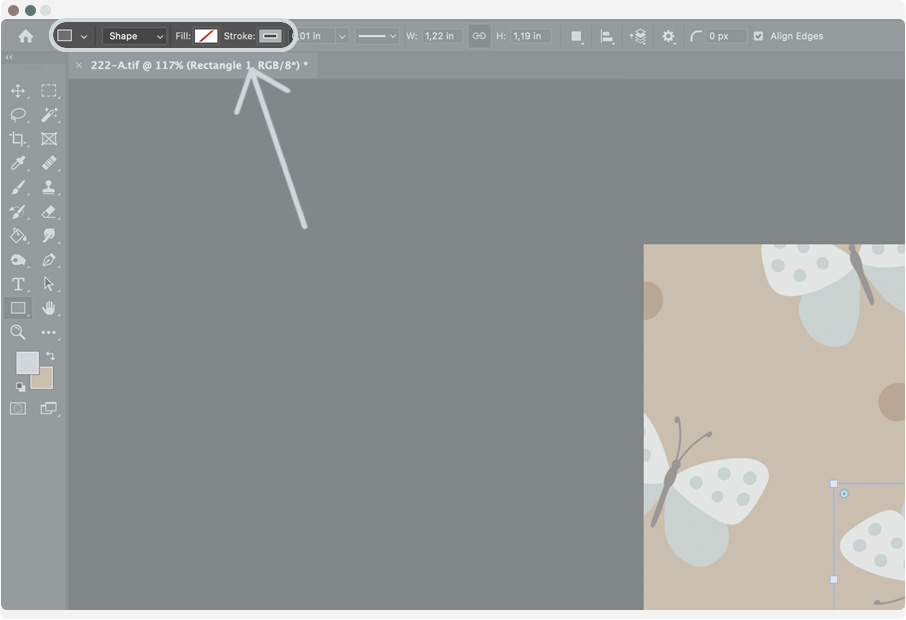
Size
The size of the tick box, i.e. your element, is next to it. The first value is the width, here under the letter "W". The second value is the height, here under the letter "H".
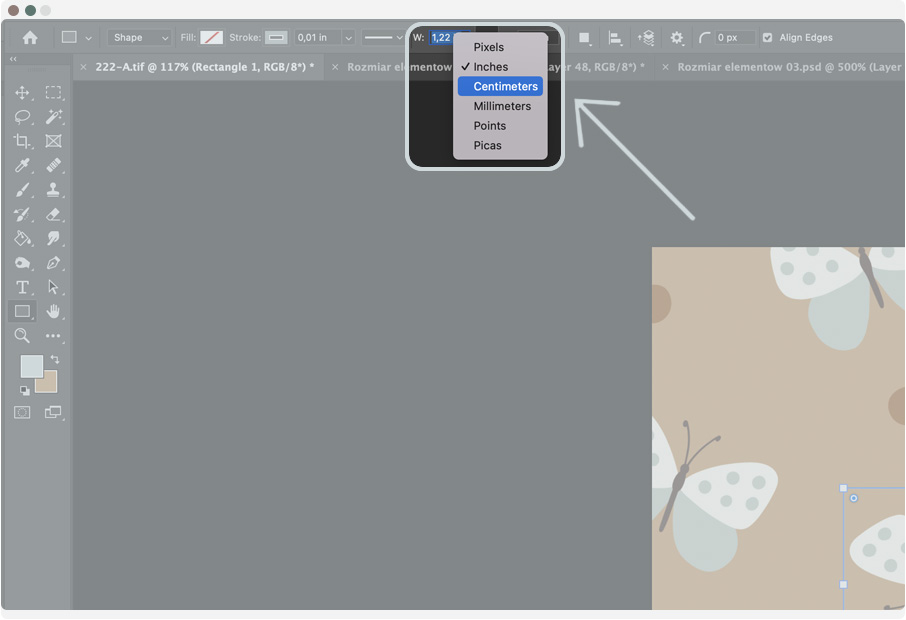
Unit of measurement
There are different units of measurement, e.g. pixels, inches, centimetres, points. If you have been given a size in a different unit than the one you need you can easily change it. Right-click on the size field and select the option you are interested in.